1.4-Software-Development-Principles
Setup your project for unit testing
To explain this process we’re going to use a previous project. In this case it is the “Car” assignment from Object-Oriented Programming week 1.
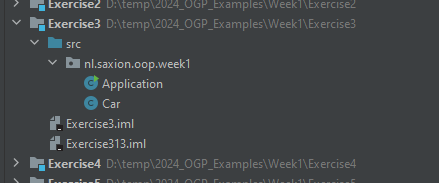
This project contains a source directory called src and a package with the code.
To setup this project we’re going to take the following steps:
- Create a test directory
- Register it for unittests
- Create a test class
- Create a test method
- Configure JUnit 5.8
- Import assert functions
- Confirm correct code
You might find this sequence a bit odd, since “configure JUnit” is only step 5.
I personally find that this sequence enables IntelliJ to automatically do some things for you in a rather simple way. You may find other tutorials online. Feel free to find a method that is comfortable and sensible to you.
After you’ve gone through these steps you can add all the unittest methods and test classes you want.
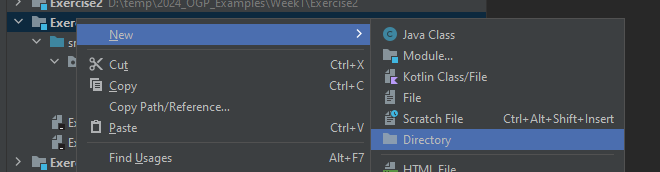
Step 1: Create a test directory
We are going to create a separate directory to contain all unittest code to keep it separate from your actual project code. (Some people call that the production code.)
Right-click on the module and choose to create a new directory and call it unittests.
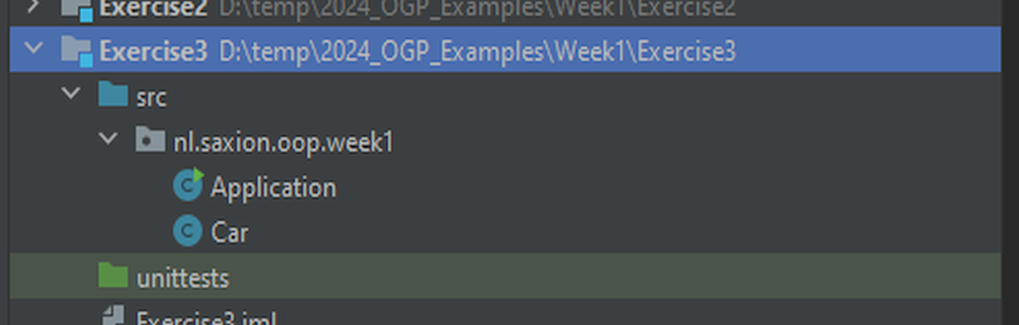
Afterward your project contains an additional directory.

The icon in front is gray, this means that your project has no special relation with that directory it’s just a place to store some stuff…
Step 2: Register a unittest directory
To tell the project that this folder contains your unittests we need to change its configuration.
Open the Project Structure menu (Ctrl-Alt-Shift-S) and select the Module/sources tab.

This project clearly has more modules, but we are configuring the one with the Car project.
When you select the new unittests directory the “Mark as:” icons light up.
Note: The
srcfolder is blue, because it is marked as the folder that contains your source code. You could have named this folder anything, but commonly “src” or “sources” is used.
The unittests folder is going to be registered as a “Tests” folder and should turn green
to indicate that change.
After closing this window your src folder should (still) be blue. The unittests folder
should now be green.
This way IntelliJ can provide you with new menu options that allow you to run all of your tests. Regrettably your folder currently is still empty.
Step 3: Create your first test class
Unittests are simply methods with a set of instructions that confirm the results of the steps it took.
@Test
public void myFirstTest() {}
We will talk about proper naming of test functions at a later time. (See Given-When-Then)
However it is still important to maintain Object Oriented Principles and keep those function together in a class with a proper name.
Take the following steps:
- Within the unittests directory
- Create a package that matches the source: nl.saxion.oop.week1
- Create a new class ‘CarTests’ in that package
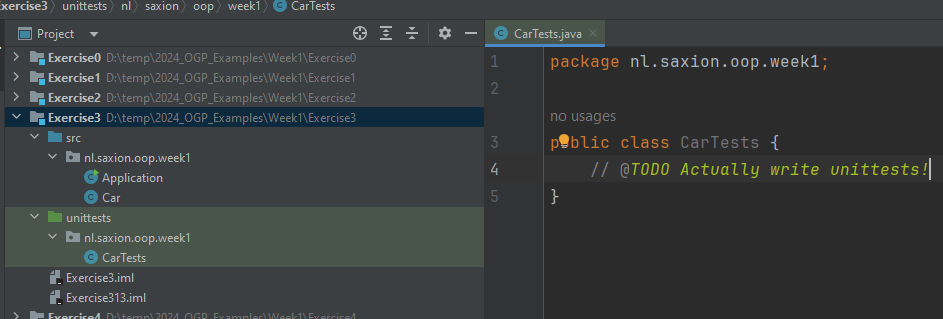
Both the src and unittests folder now contain the same package structure.
The CarTests class shared the same package, but is located in a different directory
this is exactly the way we want it.
Note: The advantage here is that the test classes, from their perspective, share the same package as the actual product code. Because of this the test classes also share the same privileges. They are allowed access to package private members. This allows you to confirm their values in your unittests. This is a minor detail, please ignore it if you are not (yet) comfortable with packages.
Step 4: Create your first unittest
The first test to do with the Car class, is to confirm that its constructor stores the data
correctly. Please add the following test code to your project:
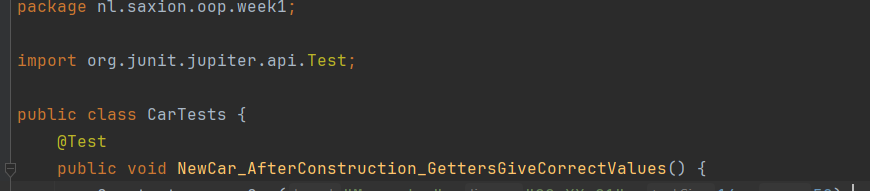
package nl.saxion.sdp.exercises.test_car;

import nl.saxion.sdp.exercises.car.Car;

public class CarTests {
	@Test
	public void NewCar_AfterConstruction_GettersGiveCorrectValues() {
		// Create a car.
		Car test = new Car("Mercedes", "00-XX-01", 16, 50);
		// Confirm that each getter returns the expected values...
		assertEquals("Mercedes", test.getBrand());
		assertEquals("00-XX-01", test.getLicense());
		assertEquals(16, test.getConsumption());
		assertEquals(50, test.getTankSize());
		assertEquals(50, test.getCurrentFuel());
		assertEquals(0, test.getTotalKm());
	}
}
Step 5: Configure the JUnit 5.8 library
If you copy this code, some statements will be red, we’re going to fix that.
The @Test line should be yellow since it is an annotation.
Place your cursor on the @Test annotation and press Alt-Enter to “fix the problem”:
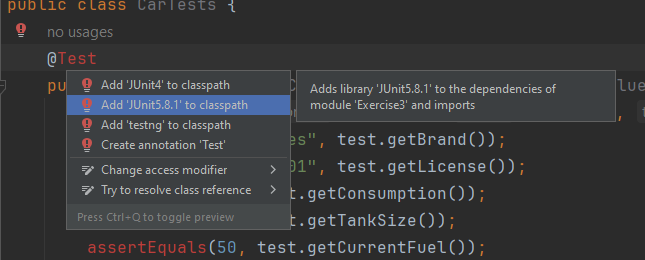
You MUST choose the JUnit 5.8.1 option. (Choose another option and you’re on you own. ;-) )
You may also need to import the test annotation:
Now the @Test annotation is yellow, and this method is registered as part of your unittests.
If you tell the project to go through all the unittests this function will be called as well.
Step 6: Import assert functions
Finally you need to make the assertEquals function available in your code:
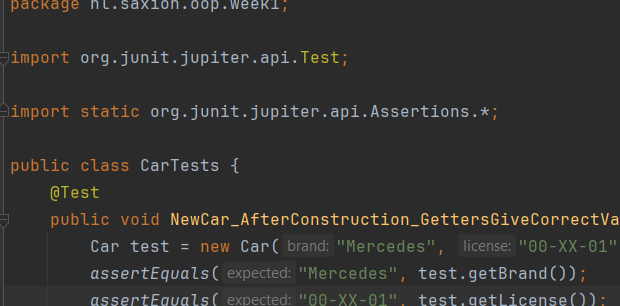
Because you have included the unittest library. Alt-Enter will automatically
add the correct import statement. I personally prefer to replace the end
of this import with a .* so that ALL assert functions immediately become available.
Step 7: Confirm correct code
If there are any mistakes left in your code, then you need to check that your getters have the same name as in this example. Either adapt the example to match your code. Or adapt your code to match the example.
Videos for support
The following videos are from our archive and don’t quite match what you need to do in terms of code examples, but are still very informative!