1.1-Introductie-Programmeren
Theory Variables 2
Competence: I can use custom data types based on primitive typed variables
Specific learning goals:
- You can create custom data types based on primitive typed variables.
- You understand the concept of encapsulating multiple pieces of information within a single data type.
- You can create classes with attributes to model real-world entities like “Student,” encapsulating various information.
- You know the significance of initializing instances of custom classes before using their attributes.
- You comprehend the process of utilizing custom data types (classes) in your code by creating instances and assigning values to their attributes.
- You can link instances of different classes together to model relationships between entities in your program.
- You understand the importance of instances in object-oriented programming and can distinguish between classes and instances.
- You can read data from external files (like CSV) and populate instances of custom classes accordingly.
The exercises can be found in the different sub-modules.
Summary
You can create your own data type to store multiple pieces of information (in the form of - primitive - data types such as int, double, boolean, char or a String / ArrayList etc.) together. For example, think about how you could represent a “student” in your code. You usually have a name, a student number, an address, etc. and all that data belongs to one student. If you then want to use more than one student in your program, you quickly come across the problem that the number of variables you have to use is increasing enormously (and is quite annoying to use). There are “tricks” available to make life easier (e.g. use lists) but in this competence you have learned that the best solution is to create your own data type (e.g. “Student”). By teaching the computer what a “Student” is, it will help you bundle this information, making life a lot better for you as a programmer.
Creating your own data type literally means that you have to include a separate file (a Java class) in your project with the name of your data type. You can then use this data type attributes (or fields) for the data you need. An attribute represents a property of the object you are trying to model, so “first name”, “last name” etc. are all valid attributes. Each attribute is placed on its own line and actually written out as a variable. Each attribute must have a name and a data type.
As an example, let’s create the data type for a Student in which we want to include a first name, last name, student number and place of residence.
You start by creating a file called “Student.java” (IntelliJ can help you with this) and provide the following content.
public class Student {
    String firstName = "No";
    String lastName = "Name";
    int studentNumber = -1;
    String city = "Nowhere";
    // Rest is omitted for demo..
}
We call this file (and the code itself) a definition of a ‘class’. Your program now contains the “class” “Student” (notice the word in the first line). The class “Student” can best be imagined as a box in which you can put other variables. Every “student” you create based on this class will automatically get a variable for “firstName”, “lastName” etc. (All attributes!). To avoid any further problems, we recommend that you always assign the attributes in these classes initial values. Of course you understand that the student is not really called “No Name” but if we now see “No Name” somewhere in our program we know that we may have made a mistake.
Using this data type in your own code looks like this:
// Somewhere in your run method
Student newStudent = new Student();
newStudent.firstName = "Tristan";
newStudent.lastName = "Pothoven";
newStudent.studentNumber = 1234567;
newStudent.city = "Enschede";

SaxionApp.printLine(newStudent.firstName); // This will print "Tristan"
Pay particular attention to the first line. The = new Student() (or the initialisation of the variable) is mandatory. With this instruction you order Java to reserve a piece of memory for the data belonging to a Student. If you do not do this and no memory is reserved then you cannot use the internal attributes (firstName, lastName) etc. (because there is no space reserved to store the content).
You can then give each attribute a value. This value obviously overwrites the previously set “default” values of an attribute. If you now forget to overwrite an attribute, the default value (as defined in the class) will remain.
Line 1 (the initialisation) also ensures that a so-called instance of the Student class is created. The difference between a class and an instance is that the class Student describes what information (attributes) you are going to remember for a Student, an instance of the Student class is a completed copy (e.g. “newStudent” is now filled in with the data of Tristan Pothoven, student number 1234567 living in Enschede). You always have only one class (blueprint, description) of something in your application (like a Student), while you can have dozens or even hundreds of instances of that class.
You will understand the power of using your own data types especially if you are going to use more than one instance of the same class. Imagine, for example, that you have all Saxion students in a csv file that you want to read and the csv file looks like this:
studnr,firstName,lastName,city
1234567,Tristan,Pothoven,Enschede
1234568,Craig,Bradley,Deventer
1234579,Gerralt,Gottemaker,Deventer
.. etc.
then you can easily create a list of “Student” instances by doing something like:
// Somewhere in your run method.
CsvReader reader = new CsvReader("students.csv");
reader.skipRow(); // the headers
reader.setSeparator(','); // set the correct csv separator

ArrayList<Student> students = new ArrayList<>(); // We'll store all Student instances in this list.

while(reader.loadRow()) {
    Student currentStudent = new Student(); // We need to initialize the variabele to make room for the contents
    currentStudent.studentNumber = reader.getInt(0);
    currentStudent.firstName = reader.getString(1);
    currentStudent.lastName = reader.getString(2);
    currentStudent.city = reader.getString(3);

    students.add(currentStudent);
}
After running this code you now have an ArrayList of Student instances in your program which you can then use. It helps if you actually see this list as a group of people. In your code you can now do all kinds of things with it, e.g. print out who lives in Enschede:
for(Student someStudent : students) { // Enhanced for-loop to iterate over the list of Student instances
    if(someStudent.city.equals("Enschede")) { // Retrieve the city attribute (type String) from the student instance and check whether it matches Enschede
        SaxionApp.printLine(someStudent.firstName + " lives in " + someStudent.city);
    }
}
Introduction
Until now you have stored data in your application using the primitive data types (int, double, boolean, char) and the String class. The problem you might have already encountered is that at some point you want to combine multiple bits of data: how, for example, do you link a student number to a student’s name? There are tricks you can come up with, for example, using multiple lists, but actually it is much more convenient to teach the computer what a “Student” data type is. And that is exactly what you’ll learn in this competence.
Before we start, it is good to clarify a few terms. To start, we are going to make our own (reference) data type in this competence, based on other data types you have already seen. Most of these data types are known as primitive data types. Primitive data types are types within Java that you write with lowercase letters, e.g. int, double, boolean, char etc. The reason why these are called primitive has mainly to do with the fact that you know exactly how large these data types are and how much memory you will need to reserve for them in your computer. All data types that start with a capital letter (e.g. String, SaxionApp, Color etc.) are more complex pieces of code that are all built using these primitive data types. The annoying thing about using these data types is that you often don’t know how much memory needs to be used to store a variable of that type. Consider, for example, a String. In a variable of the String type you can store 1 letter, 1 word, 1 sentence or even a complete book. You will understand that this makes a difference in terms of memory usage. (You’ll learn more about this in a later course.)
So we are going to create our own complex data type in the form of a “class”. A “class” is nothing more than a description of what the data type looks like (a blueprint). Such a class (or blueprint) represents an “object” or a thing you should be able to relate to as a human being. For example, an object could be a “House”, “Student”, “Person”, “Factory” etc. If you are actually going to create a variable in your code of (e.g.) type Student and store your own data in it, then you are creating an instance of this type. An instance is a single entity of a certain type.
The terms “class”, “object” and “instance” are difficult to distinguish in the beginning but together they form one of the basic principles of “Object Oriented Programming”. You’ll become more accustomed to the terminology over time.
For now, however, it is fine to just make a distinction between “class” and “instance”. A class should be seen as a description of the data type and an instance is the actual use of the data type in the form of the creation of a variable of that type. Most programs you’ll write in the near future will probably contain a limited number of classes, but are likely to contain many (tens / hundreds) instances of these classes.
Creating your own data type (or “class”)
Creating your own data type in Java is quite simple. It means creating a new file and giving it the name of your own data type. Then you must add some more information about the class, like the attributes that belong to this class.
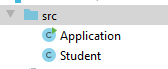
However, let’s start at the beginning and create a class file. This is done by clicking on the “src” folder with the right mouse button and then selecting “New –> Java Class”.

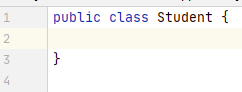
You are now prompted for a name for the class. In this case we chose “Student” and you will see that an (nearly) empty file with the correct name is opened in your editor.
The only content the file contains is the “skeleton” of a class. You will find this skeleton in every Java file. (Take a look at the Application class, you will see the same structure, but with much more content).
All you need to do now is to specify attributes. It is useful to imagine that you are actually working with “nested” variables. We are creating a class of Student that is just a label for a collection of internal variables. Suppose you would write down the following:
public class Student {
    String firstName = "No";
    String lastName = "Name";
    int studentNumber = -1;
    String city = "Nowhere";
}
then you should read it as if you have defined a “Student” data type of which each student has a firstName (String), lastName (String), studentNumber (int), city (String).
Since all you do is create variables in the Student class definition for future use, it is advisable to give them an initial (preferably and obviously invalid) value at this time.
And that is all! You have now created a “Student” class which can be used in your program to contain all the data of a Student.
Using your own data type and creating “instances”
Now that we have established the blueprint of the class we know that every student has a first name, last name, student number and place of residence. Subsequently, we can start using this as a type in our program. To do this, we need to create an ‘instance’ of the class. An instance is nothing more than a single interpretation of the class, i.e. a single student in a group of several other students. (Take e.g. your own group; you are probably in a group of 16-32 students. For each of these students they have the same blueprint but you do have 16-32 different instances of this class).
If you want to create a variable with your own data type (i.e., create an instance of it), do this as follows:
Student newStudent = new Student();
Note that this is very similar to the use of a normal variable, except that the right part is = new Student(). As mentioned earlier, this has to do with the fact that Java has to initialize all instances before they can be used. This is mandatory and will lead to errors if you forget to do so.
A few more examples could be (the classes have been omitted):
Person somePerson = new Person();
Dog myDog = new Dog();
House scaryHouse = new House();
Sport myFavoriteSport = new Sport();
Note that the name given to the variable (as with normal variables) makes no difference to the operation of your program but it does make a difference to the overall readability of your program.
If we return to the student example, we can fill in the instance (which is currently empty or only contains default values!) by entering (overwriting) the values of the variables. You do this in code in the same way as you would any other variable but there is now a “level” extra to it.
Student newStudent = new Student();

newStudent.firstName = "Tristan";
newStudent.lastName = "Pothoven";
newStudent.studentNumber = 1234567;
newStudent.city = "Enschede";

SaxionApp.printLine(newStudent.firstName); // This will print "Tristan"
Note that to change the first name of this student, you must first call the variable name of the Student type variable. So you need to read newStudent.firstName = "Tristan"; as: Replace of the student I am referring to with newStudent the value of firstName with…“. So you can’t quickly set all the names of students the same (because this isn’t usually what you want).
And that is all! You have now learned how you can write and use your own data type… But what we haven’t paid much attention to yet is why we actually want this. We therefore conclude this competence with a more elaborate example.
Serious example
Assume we have the following datasets:
students.csv
studnr,firstName,lastName,city
1234567,Tristan,Pothoven,Enschede
1234568,Craig,Bradley,Deventer
1234579,Gerralt,Gottemaker,Deventer
.. etc.
grades.csv (never mind the actual data itself :-))
studnr,courseName,date,grade
1234567,Introduction to Programming,15102012,10
1234567,Curiosity,31122020,4
1234568,Introduction to Programming, 26092018,8
1234568,Curiosity, 31082019,8
1234579,Introduction to Programming, 31112017,9
1234579,Curiosity, 28092020,10
.. etc.
(Note that the link between the two files is the student number (studnr).)
and we want to write a program that allows a student to see his grade list. We can now implement the Student class as:
public class Student {
    String firstName = "";
    String lastName = "";
    int studentNumber = -1;
}
However, right now, this class does not yet take into account the results obtained for tests. We can read the first csv and make a list of students but we want to do more with this code. If we look at the results, we see that it is relatively easy to come up with a class for test results called CourseResult.
public class CourseResult {
    String courseName;
    int grade;
    // Date omitted for now..
}
This class allows us to store the results of different courses… so if we can now link a list of CourseResults’s to a student we have in fact made a sort of grade list.
Let’s adjust our class Student to hold instances for CourseResult’s:
public class Student {
    String firstName = "";
    String lastName = "";
    int studentNumber = -1;

    ArrayList<CourseResult> results = new ArrayList<>();
}
The Student class now has an attribute results in which we can store any test results (in the form of CourseResult instances). In this way we have also linked a particular student to his or her own results.
Now that we have defined the data types, we can start reading the data from the csv file. Each line will be translated into its own Student instance and added to the list.
// Somewhere in your run method.
CsvReader reader = new CsvReader("students.csv");
reader.skipRow(); // the headers
reader.setSeparator(','); // set the correct csv separator

ArrayList<Student> students = new ArrayList<>(); // We'll store all Student instance in this list.

while(reader.loadRow()) {
    Student currentStudent = new Student(); // We need to initialize the variabele to make room for the contents
    currentStudent.studentNumber = reader.getInt(0);
    currentStudent.firstName = reader.getString(1);
    currentStudent.lastName = reader.getString(2);
    currentStudent.city = reader.getString(3);

    students.add(currentStudent);
}
Note that we have not yet done anything with the ArrayList itself. This is because we need to extract this data from another file. Once the list of students has been read (and thus the ArrayList students has been filled), we can (kind of) repeat the same process to read out the grades.
// Continuation of previous example!

reader = new CsvReader("results.csv"); // We can reuse the variable "reader" because we don't need to read any more students from that file
reader.skipRow(); // the headers
reader.setSeparator(','); // set the correct csv separator

while(reader.loadRow()) {
    int studentNumber = reader.getInt(0); // Store student number for easy access..

    // Find the right student - Helper method that loops through the students list and matches on student number.
    Student student = findStudentByNumber(studentNumber);

    // Create instance for course result
    CourseResult result = new CourseResult();
    result.courseName = reader.getString(1);
    // We're skipping the date..
    result.grade = reader.getInt(3);

    // Add course result to the found student.
    student.results.add(result);
}
In short this is what the code does: We read a result (per line) and create an instance of CourseResult for it. This instance will have to be put into the correct ArrayList (each student has their own list of results). However, since we only have a student number for this student and not “the whole instance”, we need to convert this number to the correct instance using some kind of loop (conveniently held by a helper method for readability). Finally, the CourseResult instance is added to the list of results of a specific student.
Please note that in this code we assume that everything goes well: non existing students (e.g. student numbers that do not appear in students.csv) will actually crash the system. We’ll leave the handling of this problem outside of this summary and you may assume the datasets provided are “correct” (unless specified otherwise!).
After implementing this code, we have a “data model” that consists of a list of Student instances, with each instance having its own list of results (of the CourseResult type). We can then do all kinds of operations on this list, such as counting the number of grades passed a student has obtained:
// Per student..
for(Student currentStudent: students) {
    int nrOfPassingGrades = 0;

    // Check all grades for this student
    for(CourseResult courseResult : currentStudent.results) {
        if(courseResult.grade >= 6) { // If this grade is above 6
            nrOfPassingGrades++;        // Count it!
        }
    }

   SaxionApp.printLine(currentStudent.firstName + " passed " + nrOfPassingGrades + " courses!");
}
Using toString()
Problem: Printing objects without toString()
Suppose you have a Student class that contains data such as first name, last name, and student number. When you try to print an object of this class using System.out.println() or SaxionApp.printLine(), you do not see the actual contents of the object but something like:
Without toString(): Student@1a2b3c4d
This happens because, by default, Java prints the memory location of the object if you do not define a toString() method. This is not very useful if you want to quickly see the content of the object.
Solution: Adding the toString() method
By overriding the toString() method, you can define how an object of the Student class will be displayed. The toString() method returns a string representation of the object. Once this method is added, the output becomes much more readable:
With toString(): 'Tristan Pothoven, 1234567'
Purpose of toString()
The toString() method allows you to obtain a readable text representation of the object instead of the default display of the memory location. This is especially useful when debugging, logging, or simply displaying object information.
public class Student {
    String firstName = "";
    String lastName = "";
    int studentNumber = -1;

    public String toString() {
        return firstName + " " + lastName + ", " + studentNumber;
    }
}
Tip: In IntelliJ IDEA, there is a handy way to generate a toString() implementation for a class. You can do this via the Option menu, choose Generate, and then select toString(). You can then choose which attributes you want to include, and the toString() implementation will be generated and added to your code.
Tip: Also, when debugging your code, your debug environment will display the contents of your object instead of the memory location if you have implemented the toString() method.
Summary
Overriding the toString() method in a class ensures that objects are displayed in a readable way when printed. This prevents you from dealing with cryptic memory addresses and makes working with objects in lists and log files much easier.